When an injury strikes, a migraine hits, or you need to keep a lunch cool, reaching for a homemade ice pack is often faster and smarter than running to the store. Commercial gel packs are convenient, but they can be expensive and prone to leaking. Over the past decade, I have tested dozens of DIY solutions, and the truth is that the best cold compress is often already sitting in your pantry.
A properly constructed homemade ice pack does more than just get cold. It conforms to the body, stays pliable, and provides therapeutic relief without the mess of melting ice cubes. Whether you are an athlete managing inflammation or a parent treating a bumped head, mastering this simple skill saves money and reduces waste.
This guide covers everything from the science of cold therapy to advanced recipes using rubbing alcohol and dish soap. You will learn which materials to avoid, how long to apply the pack, and how to fix common issues like condensation or freezer burn. By the end, you will never buy a single-use cold pack again.
Why Choose a DIY Ice Pack Over Store-Bought Options?
The market is flooded with colorful gel packs, but most fail within a few months. A homemade ice pack offers distinct advantages that mass-produced options cannot match. First, you control the ingredients. Many commercial packs contain toxic gels that can cause skin irritation if they leak. Second, the cost difference is staggering. A single store-bought pack costs between $10 and $25, while a DIY version uses items you already own.
Key benefits of a homemade solution:
- Customizable shape: You can create a pack that fits an ankle, neck, or wrist perfectly.
- Emergency availability: Need a cold compress at 2 AM? You have the materials.
- Eco-friendly: Reduce plastic waste by reusing the same bag or fabric for years.
Additionally, store-bought packs often freeze into rigid bricks. A well-made homemade ice pack remains flexible, allowing it to wrap around a swollen joint or curve against a forehead. This flexibility is crucial for effective cryotherapy, as it maximizes skin contact.
Understanding the Science of Cold Therapy (Cryotherapy)
Before mixing ingredients, it helps to understand why we apply cold. Cryotherapy, or cold therapy, constricts blood vessels, which reduces blood flow to an injury. This process minimizes swelling and inflammation. A homemade ice pack works best during the first 48 hours after an acute injury, such as a sprain, strain, or bruise.
The physiological effects include:
- Vasoconstriction: Narrowed blood vessels limit internal bleeding.
- Reduced nerve activity: Cold acts as a natural analgesic, numbing sharp pain.
- Metabolic slowdown: Lower tissue temperature prevents secondary cell damage.
However, timing matters. Apply your homemade ice pack for 15 to 20 minutes at a time. Longer applications risk frostbite or nerve damage. Always wrap the pack in a thin towel or cloth. Direct skin contact, even with a soft gel pack, can cause ice burns. The goal is therapeutic cold, not freezing the tissue.
Essential Materials for a Homemade Ice Pack
You do not need special equipment. Most recipes rely on common household items. The key is choosing a durable, leak-proof container and a freezing agent that remains slushy.
Basic container options:
- Zip-top freezer bags (double-bag for safety)
- A clean athletic sock
- A sponge (new, unused)
- A cloth diaper or flannel square
Freezing agents to use:
- Rubbing alcohol (isopropyl)
- Dish soap (blue or clear works best)
- Corn syrup
- Salt (table or rock)
- Vodka or cheap liquor
Avoid glass jars, as they shatter when the liquid expands. Also, avoid thin sandwich bags, which puncture easily. For the most reliable homemade ice pack, combine a liquid that freezes slowly with a durable outer layer.
Top 5 DIY Homemade Ice Pack Recipes
After years of testing, these five recipes deliver consistent results. Each uses different materials depending on what you have available.
1. The Rubbing Alcohol & Water Gel Pack
This is the gold standard. Rubbing alcohol has a freezing point of -128°F, which means it never becomes rock solid. When mixed with water, it creates a slushy, moldable gel.
Ingredients:
- 2 cups water
- 1 cup rubbing alcohol (70% isopropyl)
- A few drops of blue food coloring (optional)
Instructions:
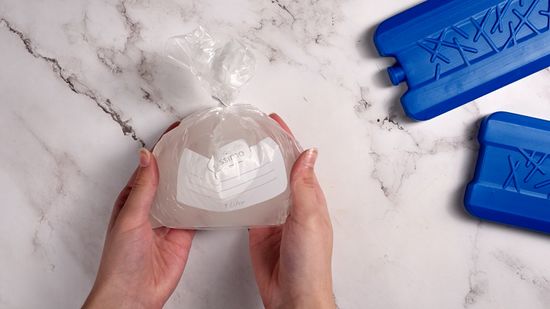
Pour both ingredients into a heavy-duty freezer bag. Add food coloring to distinguish it from food items. Seal the bag, removing as much air as possible. Double-bag it to prevent leaks. Freeze for at least 4 hours. The result is a soft, flexible homemade ice pack that conforms perfectly to the body.
2. Dish Soap Ice Pack
Dish soap does not freeze completely. It transforms into a dense, icy gel that remains pliable for up to an hour. This is the easiest recipe because it uses one ingredient.
Ingredients:
- ½ cup of blue or green dish soap (brands like Dawn work best)
Instructions:
Pour the soap directly into a small freezer bag or a clean silicone pouch. Seal tightly. Freeze overnight. Because soap is thick, it takes longer to freeze than water. Once solid, it feels like a cold gel pad. This homemade ice pack is excellent for lunch boxes because even if it leaks, the soap is non-toxic.
3. Corn Syrup or Corn Syrup & Salt
For an extra-cold pack that stays frozen longer, corn syrup is ideal. It has a high viscosity and resists freezing solid. Adding salt lowers the freezing point further.
Ingredients:
- 1 cup corn syrup (light or dark)
- 2 tablespoons salt
Instructions:
Mix the corn syrup and salt directly in the bag. Seal and shake well. Freeze for 6 hours. This mixture becomes a thick, gooey substance that holds cold temperatures for nearly twice as long as a water-based pack. Use this homemade ice pack for severe injuries or long car trips.
4. The Sponge Ice Pack
This is a dry, leak-proof option perfect for children or travel. A wet sponge freezes into a soft, flexible pad that absorbs condensation.
Ingredients:
- One new cellulose sponge
- Water
Instructions:
Soak the sponge completely. Squeeze out excess water so it is damp, not dripping. Place the sponge inside a zip-top bag or simply freeze it as-is. Once frozen, the sponge becomes a soft, pliable homemade ice pack. Because there is no loose liquid, it will never leak. Wrap it in a paper towel before applying to skin.
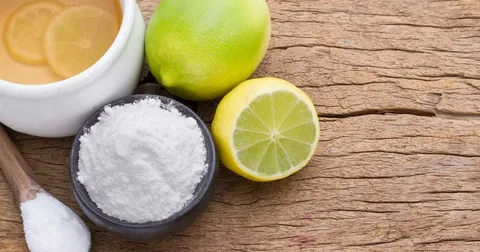
5. Salt Water Ice Pack
Salt disrupts the formation of ice crystals. A saltwater solution remains slushy in the freezer, making it an excellent emergency option.
Ingredients:
- 3 cups water
- ½ cup table salt
Instructions:
Stir the salt into warm water until dissolved. Let it cool. Pour into a freezer bag and seal. Freeze for 4 hours. This homemade ice pack will be softer than plain ice but harder than the alcohol version. It is ideal for backs and shoulders where you need some rigidity but not a solid block.
How to Make a Homemade Ice Pack for Injuries (With No Leaks)
Leaks are the number one frustration. Nothing ruins a recovery session like sticky alcohol or soap seeping onto a bandage. To build a leak-proof homemade ice pack, follow the double-bag method with a twist.
Step-by-step leak prevention:
- Fill your primary bag with the chosen liquid (alcohol, soap, or syrup).
- Seal it, but leave one inch unsealed.
- Submerge the bag in water up to the seal line to push air out. Then seal completely.
- Place that bag inside a second bag. Add a paper towel between the bags. If the inner bag leaks, the paper towel absorbs it.
- Finally, place the double bag inside an old sock or wrap it in a thin cotton cloth.
This outer cloth serves two purposes. It absorbs condensation, and it provides a barrier between the cold and your skin. A successful homemade ice pack should never leave you wiping up a puddle.
Common Mistakes When Making a Cold Compress
Even simple recipes fail due to small errors. Avoid these pitfalls to ensure your homemade ice pack works when you need it most.
Mistake #1: Using too much alcohol.
A 50/50 mix of water and rubbing alcohol is optimal. Pure alcohol stays liquid, but it does not stay cold enough for therapeutic use. It warms up too quickly. Stick to 2 parts water, 1 part alcohol.
Mistake #2: Filling the bag completely.
Liquids expand when frozen. If you fill a bag to the brim, it will burst. Leave at least two inches of empty space at the top. Lay the bag flat in the freezer so the liquid spreads out thinly. A flat homemade ice pack covers more surface area and freezes faster.
Mistake #3: Ignoring freezer burn.
Freezer burn occurs when air hits the liquid. Always vacuum-seal the bag by removing excess air. If you see ice crystals forming inside the pack, the seal is weak. Replace the bag immediately.
Mistake #4: Applying directly to skin.
Even a soft gel pack at 0°F can damage skin within 10 minutes. Always use a cloth barrier. If the skin turns white or numb, remove the pack immediately.
Homemade Ice Pack vs. Gel Pack vs. Ice Cubes
To help you decide which method to use, here is a comparison of the three main cold therapy options.
| Feature | Homemade Ice Pack | Commercial Gel Pack | Ice Cubes in a Towel |
|---|---|---|---|
| Cost | $0–$2 | $10–$25 | Free |
| Flexibility | High (slushy) | Medium (softens slowly) | Low (rigid) |
| Leak Risk | Medium (if sealed poorly) | Low (but toxic) | High (water everywhere) |
| Time to Freeze | 2–4 hours | 4–6 hours | 1 hour |
| Best Use Case | Joints, faces, travel | Reusable medical use | Emergency short-term |
A homemade ice pack wins on flexibility and cost. Commercial gel packs last longer in terms of durability, but they are not customizable. Ice cubes are only useful for the first 5 minutes before they melt into a puddle. For chronic conditions like arthritis or tendonitis, the DIY gel pack is superior because it wraps around the affected area.
How to Use a Homemade Ice Pack Safely (The RICE Method)
Cold therapy is only effective when combined with proper injury management. The RICE method—Rest, Ice, Compression, Elevation—is the gold standard for acute injuries. Your homemade ice pack fulfills the “Ice” component.
Safe application protocol:
- Duration: 15-20 minutes maximum.
- Frequency: Every 2 to 3 hours for the first 48 hours.
- Compression: Wrap the pack snugly with an elastic bandage, but not so tight that you lose circulation.
- Elevation: Keep the injured limb raised above the heart while icing.
Do not use a homemade ice pack on open wounds or areas with poor circulation, such as diabetic feet. If you have Raynaud’s disease or cold urticaria (an allergy to cold), consult a doctor before using any cold compress.
Creative Uses Beyond Injuries
While injuries are the primary reason to make a homemade ice pack, these DIY tools have dozens of other applications around the home and office.
For migraines and headaches:
A soft, slushy pack molds to the eye sockets and forehead. The alcohol-based recipe works best here because it stays flexible at very low temperatures. Keep one in the freezer specifically labeled for headaches.
For lunch boxes and picnics:
The dish soap or corn syrup pack stays cold for hours without leaking food-safe chemicals onto sandwiches. Place one at the bottom of the lunch bag and another on top. They are reusable and washable.
For plantars fasciitis:
Freeze a water bottle or a small sponge pack. Roll your bare foot over it for 5 minutes. This combines cold therapy with massage. A cylindrical homemade ice pack is perfect for arch pain.
For reducing facial puffiness:
Wrap a small, thin pack in a silk cloth. Apply to under-eye circles for 5 minutes in the morning. The cold constricts blood vessels and reduces swelling.
For keeping cool in summer:
Place a soft pack on the back of your neck or inside your hat. This lowers core body temperature during heatwaves or outdoor work.
Frequently Asked Questions (FAQ)
How long does a homemade ice pack stay cold?
It depends on the ingredients. A water and alcohol pack stays cold for 15-20 minutes. A corn syrup pack can last up to 45 minutes because of its high viscosity and slow thaw rate. Always test your specific recipe.
Can I use hand sanitizer to make a gel pack?
Yes, but check the alcohol content. Most hand sanitizers contain 60-70% alcohol, which is too high. It will freeze into a hard gel, not a slush. Mix one part hand sanitizer with two parts water to create an effective homemade ice pack.
Why did my homemade ice pack freeze solid?
You used too much water and not enough freezing agent (alcohol, salt, or syrup). The ratio is critical. For a soft pack, ensure at least 30% of the mixture is a non-freezing agent.
Is it safe to reuse the same bag multiple times?
Yes, but inspect the seals each time. The repeated expansion and contraction of freezing weakens plastic. After 10 to 15 freezes, transfer the gel to a new bag. Better yet, use a reusable silicone stasher bag for a permanent homemade ice pack.
What is the best homemade ice pack for a black eye?
Use the sponge recipe. It is soft, lightweight, and applies even pressure without being too heavy. Freeze two small sponges so you can rotate them every 10 minutes.
Can I add essential oils to my cold compress?
Yes, add 3-4 drops of peppermint or lavender oil to the liquid before freezing. Peppermint provides a cooling sensation that complements the cold. Lavender offers a calming effect for headaches. Do not apply essential oils directly to broken skin.
How do I clean a smelly ice pack?
If your homemade ice pack develops a musty odor, it has mold or bacteria. Discard it immediately. To prevent smells, always use distilled water and clean the outer bag with rubbing alcohol between uses.
H2: Pro Tips for Maximum Effectiveness
After helping hundreds of readers optimize their DIY cold therapy, these three advanced tips make the biggest difference.
Tip 1: Create a multi-layered wrap.
Do not just throw the pack on the injury. Layer it: Skin -> Thin cotton cloth -> Homemade ice pack -> Towel -> Elastic bandage. This traps the cold and prevents it from dissipating into the room.
Tip 2: Keep two packs in the freezer.
Always rotate. While you use one homemade ice pack, the other is re-freezing. For chronic conditions requiring multiple sessions per day, this ensures you never have to wait.
Tip 3: Label everything clearly.
A blue gel pack in a freezer bag looks exactly like a bag of frozen blueberries. Use permanent marker to write “ICE PACK – DO NOT EAT” on the bag. Better yet, use a red or orange bag that stands out.
When to Stop Using Ice and Switch to Heat
A homemade ice pack is not always the answer. Knowing when to stop icing is as important as knowing how to ice.
Continue using ice if:
- You have a new injury (less than 48 hours old).
- There is visible swelling or redness.
- The area feels hot to the touch.
Switch to heat if:
- The injury is chronic (older than 48 hours).
- You have stiff joints or muscle spasms.
- There is no swelling present.
Applying a homemade ice pack to a chronic stiff neck can actually worsen the stiffness by constricting already tight muscles. Heat promotes blood flow and relaxation. Listen to your body. If the cold causes sharp pain rather than a dull ache, stop immediately.
Final Thoughts on Mastering the Homemade Ice Pack
Creating a reliable homemade ice pack is a life skill that takes five minutes to learn and saves years of frustration. You now have five proven recipes, from the standard rubbing alcohol gel to the dry sponge method. You understand the safety protocols, the common mistakes, and the best practices for long-term storage.
The next time you twist an ankle, develop a migraine, or need to keep a salad cool, you will not waste money on an overpriced gel pack. You will walk to your kitchen, grab a freezer bag, and mix the perfect cold compress in under 60 seconds. Keep one in your freezer today, because injuries never announce themselves. Be prepared, stay flexible, and ice smart.


Leave a Reply